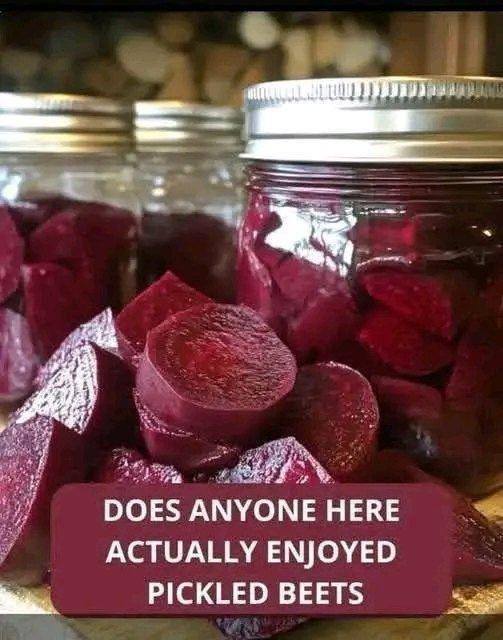
Homemade Pickled Beets Recipe – Sweet, Tangy, and Full of Comfort
Pickled beets are a handcrafted, nostalgic comfort dish that quickly improves any meal with their rich red color and sweet, tart flavor. They are easy to make but have a unique flavor each time you open a jar. They are simmered with vinegar, sugar, and spices.
What Are Pickled Beets?
Pickled Beets are cooked beets preserved in a sweet and tangy vinegar brine. They’re soft, flavorful, slightly earthy, and packed with vibrant color.
The flavor is a beautiful balance of:
- Sweetness
- Tanginess
- Mild earthiness
- Warm spice notes
They can be served:
- Cold straight from the jar
- On salads
- In sandwiches
- Alongside grilled meats
- On cheese boards
- Or simply as a healthy snack
And somehow, they taste even better after sitting overnight in the fridge.
Why I Love This Recipe
This recipe became special to me because it feels old-fashioned in the best possible way. There’s no rushing involved. You boil the beets slowly, peel them carefully, simmer the brine, and wait patiently while everything absorbs flavor.
Last Sunday, while making these, I ended up standing in the kitchen for almost an hour just talking with my mother about recipes she remembered from childhood. It’s funny how certain foods can open up memories so naturally.
And the taste? Honestly better than store-bought versions. Homemade pickled beets taste fresher, softer, and less overly acidic.
Ingredients You’ll Need
For the Beets
- 2 pounds fresh beets
- Water for boiling
For the Pickling Brine
- 1 cup white vinegar
- ½ cup apple cider vinegar
- ¾ cup sugar
- 1 teaspoon salt
- ½ teaspoon black peppercorns
- 2 cloves
- 1 small cinnamon stick
- ½ cup water
Choosing the Best Beets
Fresh beets make all the difference.
When shopping, look for:
- Firm texture
- Smooth skin
- Deep color
- Smaller to medium size
Smaller beets usually taste sweeter and cook more evenly.
One mistake I made years ago was buying giant oversized beets. They looked impressive, but the texture became woody and less flavorful.
Step-by-Step Instructions
Step 1: Wash the Beets
Rinse the beets thoroughly under cold water.
Don’t peel them yet. Leave the skins on while boiling because this helps preserve both color and flavor.
Trim the leafy tops, but leave about an inch of stem attached.
Step 2: Boil the Beets
Place the beets in a large pot and cover with water.
Bring to a boil, then reduce heat and simmer for:
- 35–50 minutes
Cooking time depends on size.
You’ll know they’re ready when a knife slides in easily.
The kitchen always smells earthy and comforting during this stage. Last weekend, it honestly reminded me of rainy afternoons at my grandmother’s house.
Step 3: Cool and Peel
Drain the cooked beets and let them cool slightly.
Once cool enough to handle:
- Rub the skins off gently with your hands or paper towels
The skins slide off surprisingly easily.
Fair warning though — your hands may turn pink for a while. Mine definitely did.
Step 4: Slice the Beets
Cut the peeled beets into:
- Thin rounds
- Wedges
- Or cubes
I personally prefer slices because they absorb the brine beautifully.
Step 5: Prepare the Pickling Brine
In a saucepan, combine:
- White vinegar
- Apple cider vinegar
- Sugar
- Salt
- Water
- Peppercorns
- Cloves
- Cinnamon stick
Bring everything to a gentle boil.
Stir until the sugar dissolves completely.
At this point, the smell becomes absolutely incredible — sweet, tangy, warm, and slightly spicy.
Step 6: Add the Beets
Carefully place the sliced beets into the simmering brine.
Cook for another:
- 5–10 minutes
This allows the beets to absorb flavor while staying tender.
Step 7: Transfer to Jars
Using clean glass jars:
- Fill with beets
- Pour hot brine over the top
Make sure the beets are fully covered.
Let cool completely before refrigerating.
The Hardest Part – Waiting
Technically, you can eat them immediately.
But honestly?
They taste SO much better after chilling overnight.
Last weekend, I tasted one warm slice straight from the pot and thought it was good. The next day? Completely different flavor. Richer, sweeter, tangier, and more balanced.
Patience really matters with pickled recipes.
Flavor Variations
Sometimes I change the spices depending on mood or season.
Sweet Version
Add:
- Extra sugar
- Orange peel
Spicier Version
Add:
- Chili flakes
- Mustard seeds
Herbal Version
Add:
- Fresh dill
- Bay leaves
One winter evening, I added orange peel and cinnamon together, and the flavor felt almost holiday-like.
Ways to Serve Pickled Beets
These are surprisingly versatile.
My Favorite Ways
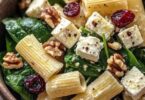
Salad Topping
Amazing with goat cheese and walnuts.
Sandwiches
Adds tangy freshness instantly.
Cheese Boards
Pairs beautifully with sharp cheeses.
Burgers
Sounds unusual, but it works.
Straight from the Jar
Honestly, this is how my family usually eats them.
Storage Tips
Store in airtight glass jars in the refrigerator.
Best flavor:
- After 24 hours
Shelf life:
- Up to 2 weeks refrigerated
The flavor deepens every day.
Nutritional Information (Per Serving)
| Nutrient | Amount |
|---|---|
| Calories | 75 kcal |
| Carbohydrates | 17 g |
| Protein | 1.5 g |
| Fat | 0.2 g |
| Fiber | 2.5 g |
| Sugar | 13 g |
| Sodium | 180 mg |
| Potassium | 220 mg |
| Vitamin C | 6% DV |
| Folate | 20% DV |
Common Mistakes to Avoid
Overcooking the Beets
They should be tender, not mushy.
Using Too Much Vinegar
Too much acidity can overpower the sweetness.
Skipping the Chill Time
Flavor improves dramatically overnight.
Not Covering the Beets Fully
The brine should completely cover the beets for proper flavor.
Frequently Asked Questions
Can I use canned beets?
Yes, but fresh beets taste much better and have better texture.
Are pickled beets healthy?
Absolutely. They contain fiber, antioxidants, folate, and important nutrients.
Why are my pickled beets too sour?
Usually because the vinegar-to-sugar balance needs adjusting.
Can I freeze them?
Not recommended because the texture changes after thawing.
Final Thoughts
There’s something deeply comforting about homemade Pickled Beets. Maybe it’s the old-fashioned process, the beautiful color, or the way every jar feels homemade in the truest sense.
For me, this recipe isn’t just about preserving vegetables. It’s about slowing down, sharing stories in the kitchen, and making food that lasts beyond a single meal.